HOW TO

outsource product photo editing

Costing can be tricky when you outsource product photo editing to an image editing company. You were frequently stumped about just how much you should bill your client. You get questions and become stranded in the process for almost an eternity. These types of queries

1.How much would I predict their budget to be?
2.Is it feasible that I’m raising prices or undercutting?

Every project occupies your full attention. You can save money and effort by outsourcing your image demands. You also must ensure that the increased prices are transferred on to your clients and that they would be justified. As a consequence, you must fully realize how to compensate your clients for your photos. You could simply pick your rate depending on a number of key variables such as the day, period, data, and content, amongst many others.

Brief
Taking incredible photos of your personnel and product would not be enough. Once the photographs are live on your website, you should make sure they stand prominent. And, that is why outsource product photo editing by a qualified photo editor is necessary. A skilled photo editing or retoucher can boost the appeal of your images, which will help you in making more.

This is certainly the case for time-consuming post-production tasks. Bringing professionals in-house could make sense if you require creative image processing or are really finicky about preserving your photographs on-brand, as much as you can justify the investment.

How much will you probably have spent on outsourcing image retouching if you’re selecting the third-party route? The key thing to remember is that your costs will range from $39 to $10 per image. Because there is a very wide range, various payment schemes to consider, and how to adjust your expenditure in this piece.

Photo Editing Comparison Following Cost
Doing your studies and then doing the maths is the surest way to figure out if a provider is overcharging or undercharging. You’ll have such a better sense of which suppliers to engage with after you realize how much different companies charge. Accounts for the fact are;

The Quality
Quality is the priority of determining a service provider who is efficient for you in serving the best. At the same time, the cost of the service must vary considering the expertise level and the output. Premium-quality work should really be reflected in high fees.

Nevertheless, not all providers charge amounts that are equal to their performance. While a few photo editors outrageously overcharge for their work, there are many other competent individuals who demand reasonably modest charges.

So, when someone gives you satisfactory quality output, you do not need to look for someone who is offering less for similar but not the same quality. Obviously, saving the cost of outsourcing is beneficial for the company revenue but not by compromising the quality for sure.

Ethical Memorandum
By comparing providers, direct yield isn’t the only thing to consider. Company ethics are really quite significant. Have been they giving their employees a decent wage? Do they foster environmentally sustainable business practices?

Aligning yourself alongside agencies that seem to be doing good in the world is really a smart idea. We help make a difference, ecologically sound practices, and anti-corruption in our approach, culture, both day and operations, for example, as a United Nations Global compact Partner.

Performance And Activities
Are individuals able to communicate with people? How convenient is it to interact with the provider, aside from the operations they give well? Are you prepared to respond? Do you keep to deadlines?

These factors have to be taken into considerations while comparing providers and the pricing. A supportive picture editor with a great work ethic may be a little more pricey, but if they make the job easier, their fees should be well worth it. That’s why our customer support team is available 24 hours a day, 7 days a week, by email or online chat, to reply to customers in terms of their time zone.

Price Graph
Usually, the rate of picture retouching is determined largely by the pricing system of your vendor. Some image retouchers may charge by the photo, by project, weekly, monthly, or yearly. It is a much more clear method of charging that makes planning easier. Some providers charge an hourly basic framework, while others offer a monthly or bulk subscription strategy for their solutions.

Payment Per Image
You can have a subscription of the image editing per count with a monthly or yearly pricing plan. So, you need to provide the contractor with your retouching demands, and they answer with a fixed sum.

Well, there are some advantages and disadvantages to this plan. The advantages are, you can have fixed pricing with a clear concept without any hassle. So, you pay for the editing that you asked for. Also, you will be free of month-end billing or uncertain amount that you might have to pay. And, the most important one is your budget planning. You can plan how many images you want to retouch by outsourcing in a calendar month.

On the other hand, the cons of per image payments are, you need to keep your own record of how many images you have in a project or all of your projects. So, obviously, you need to keep an extra concentration that could hamper your regular work. Also, you may have to pay the retouching bills a couple of times in a month depending on the done images.

Monthly Payment Method
A monthly payment method is the best choice if you want to take services from a specific provider all the time. You can pay a flat fee for the photo editing works you want to outsource. Well, if you take the subscription of a number of images to be edited by the provider, you can do that as well.

Simply, there are some pros and cons here as well. The pros are the method is predictable that how many images you are processing and are you exceeding the limit or not. This method is perfect for large projects containing enough images you have in hand. Also, you do not need to think of any other service providers as they will make the plan to give you the support within the deadline.

As for the cons, there is no flexibility in increasing or decreasing the projects or number of files. You need to specify the total project counts and the whole number of images you want to be processed. Most importantly, you do not have the choice to decrease the number and pay less because, once you take the subscription, you need to pay in advance and whether you get the service or not, you will not have any credit left at the end of the month.

Per Hour Method
You can also get hourly services from some of the suppliers regarding photo editing. If you have a contract with the provider with the method, they will let you know the criteria and how they make the invoice for you to pay.

Here also there are some pros and cons. And, the pros are, the project is flexible where you can decide what to do and what not to. So, you have the power to change the work scope and the provider have to obey that. Also, there is no limit to photo editing except for the hour schedule.

The cons are, the price of the work is not fixed and it could vary from little to huge. Secondly, you cannot have an idea of the total cost until the completion of the project or time. So, technically, it is quite difficult to meet your budget. Also, the cost could be a little higher than others.

Tip: Unless you’re contemplating between pay-as-you-go and hourly billing, here’s a solid suggestion: Calculate how many pictures you’ll have to edit per month. Then multiply the number of images by the supplier’s monthly cost. This will give you an estimate of how much the shot will cost. Comparing this certain sum to other companies’ pay-as-you-go prices, select a more cost-effective one.

Things You Should Focus On Photo Editing Pricing
It’s absolutely vital to glance at the factors that go into image postprocessing to realize why photo editing firms or agencies charge what they do. Here are a few changes and things to consider while retouching photos:

Photo Editing Tool
A further key consideration is the supplier’s software and hardware. Photo editors who have been using specialized or advanced technologies will almost undoubtedly charge more for those who utilize ordinary software and services.

Image Difficulty
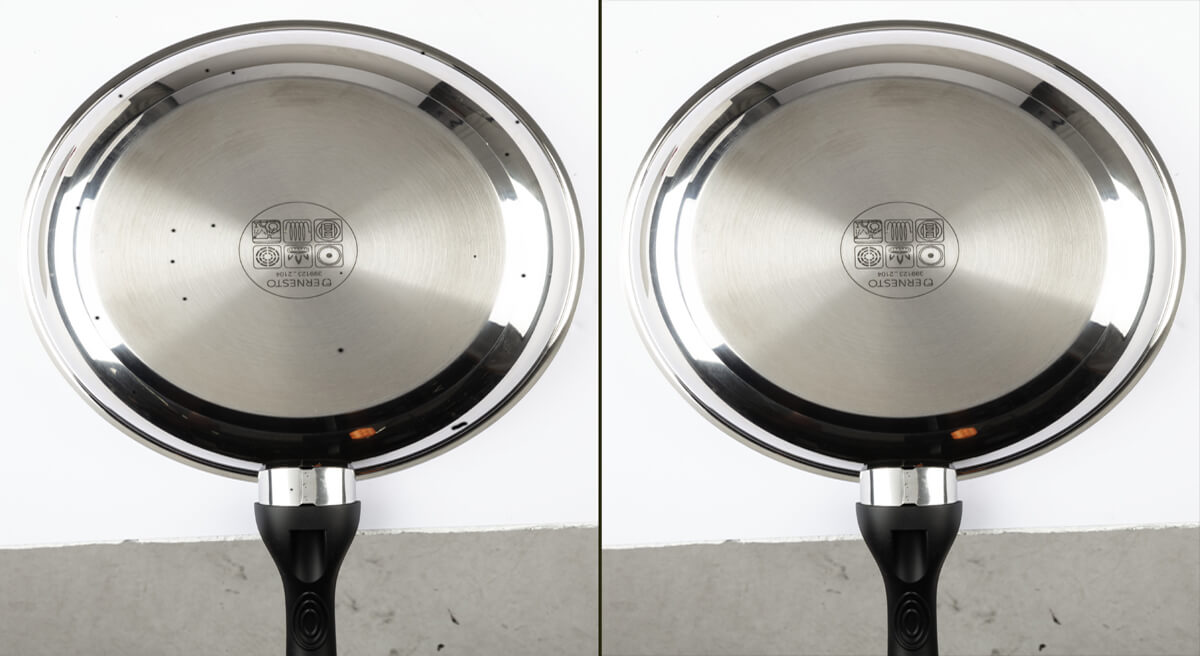
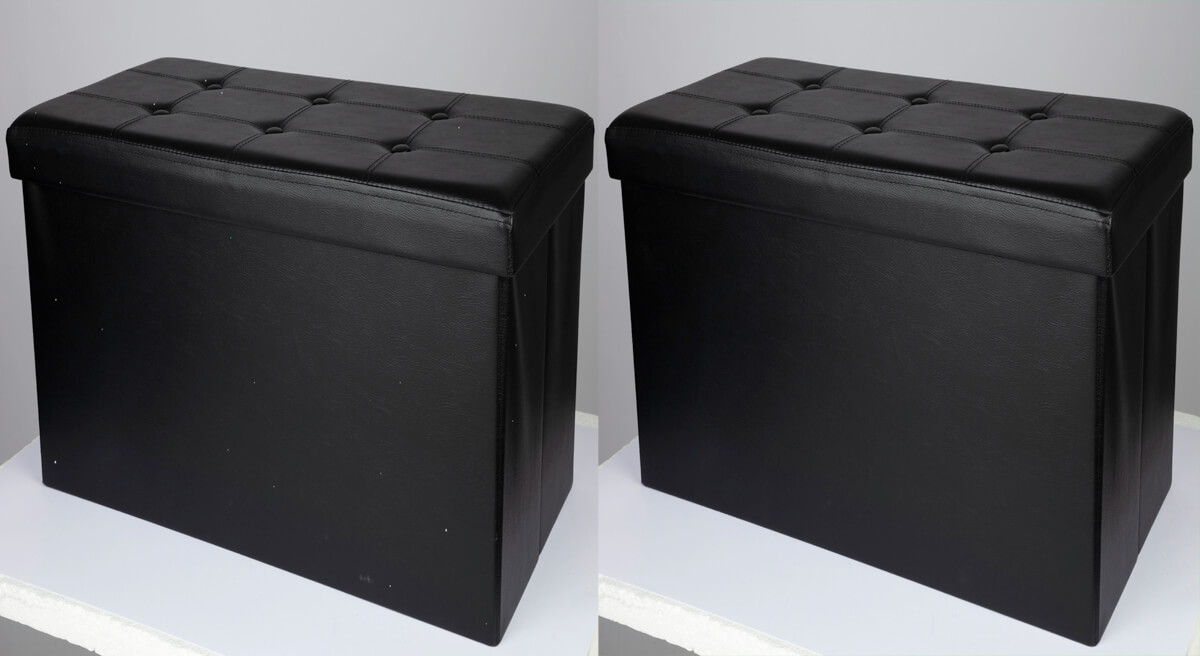
The procedure of “cleaning up” a photo that seems simplistic, but depending on the sort of service you need to retouch and so the nature of the editing, it could be quite a time-consuming process.

Simple changes like erasing the background or stripping away smudges would be far less expensive than some of the more complex tasks like placing the subject in a distinct background/environment or blending many pictures.

The Wages
Many on the low end can perform minor adjustments like removing deformities or backgrounds, those of us on the high end can undertake more complicated adjustments like picture transformation and other advanced retouching strategies.

You should also ponder about the vendor’s location. Companies or individuals based in a minimal locale will be more inexpensive than those situated in a big North American or European region.

The Quantity
And what was the overall amount of photographs you will have to edit? When you book a lot of pictures from a provider, you could get a rebate, so you’ll ultimately end up paying less per picture. By using Edit Credits, you might even get a discount on picture retouching services. You may indeed contact us directly to get a bulk order discount if you want hundreds of images edited per year.

Turnaround time
The turnaround time is one of the major focusing parts in outsourcing photo editing service. “Time is money” and if you want the best use of your time, you need to choose the provider who can meet your schedules appropriately. If you’ve had a strict time limit, certain providers may demand more, so end up spending a hurry fee if you do need your modifications in a handful of hours or days.

Budget Planning
Have you had a solid idea of what payment format will work best for business? Nice. Let’s go about how to budget for photo editing. The content of your images and the difficulty of your task are the two most important factors to be considered.

The Subject
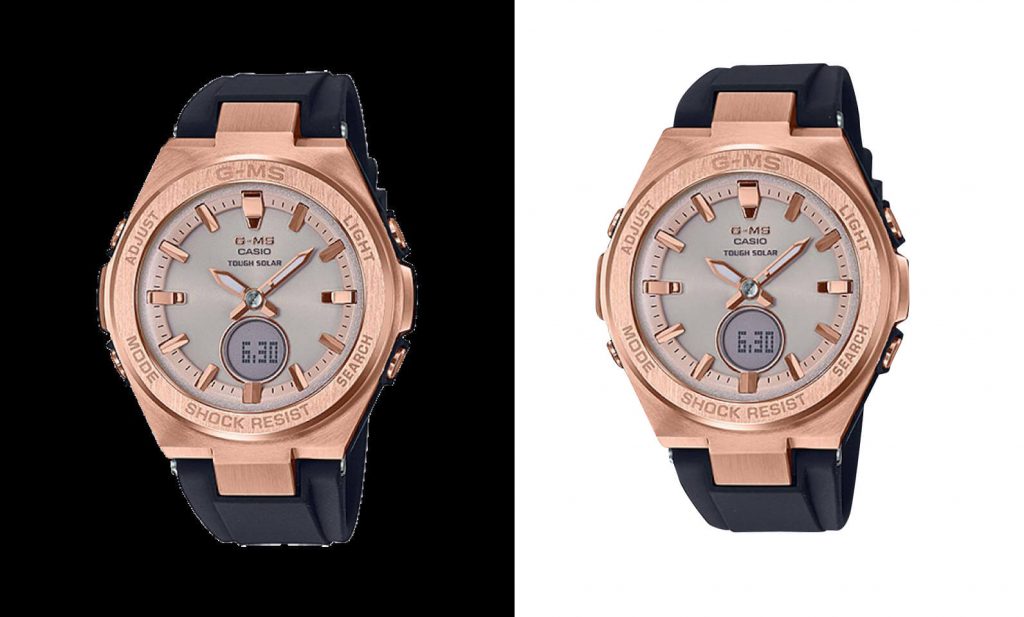
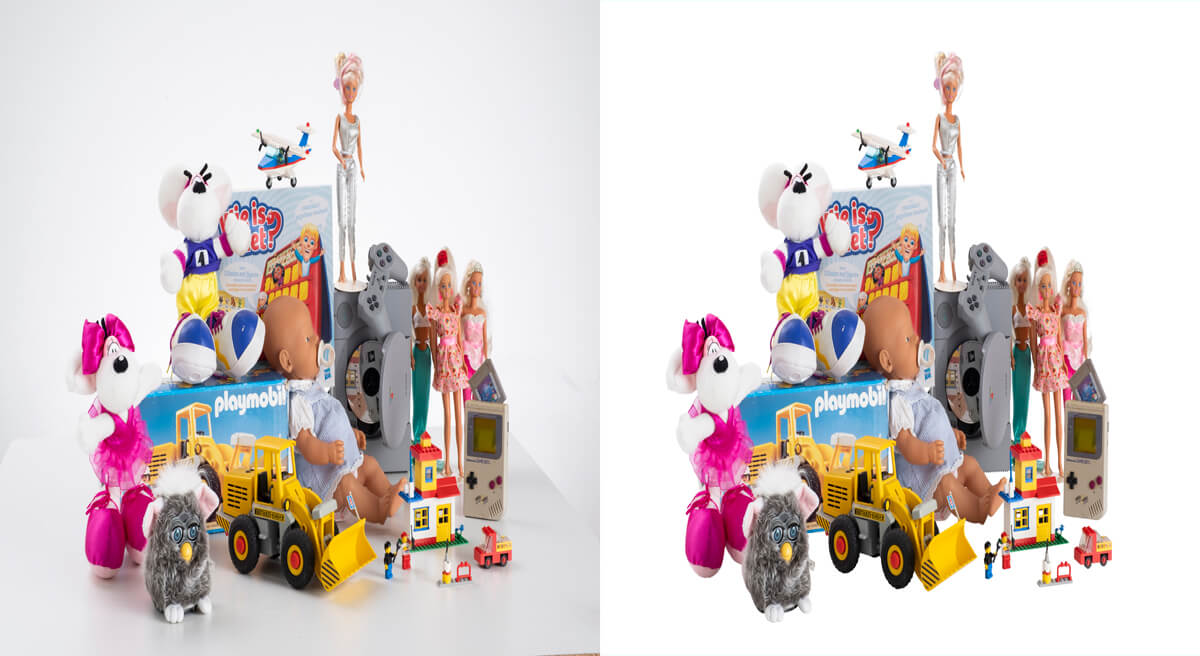
As up until recently discussed, products with neat forms or edges, while those that come in solid colors rather than gradients are far less expensive than those who have fuzzier or intricately-shaped structures. The cutout of a box-shaped object costs less where a furry doll with so many thin edges will cost more.

Editing Methods You Need
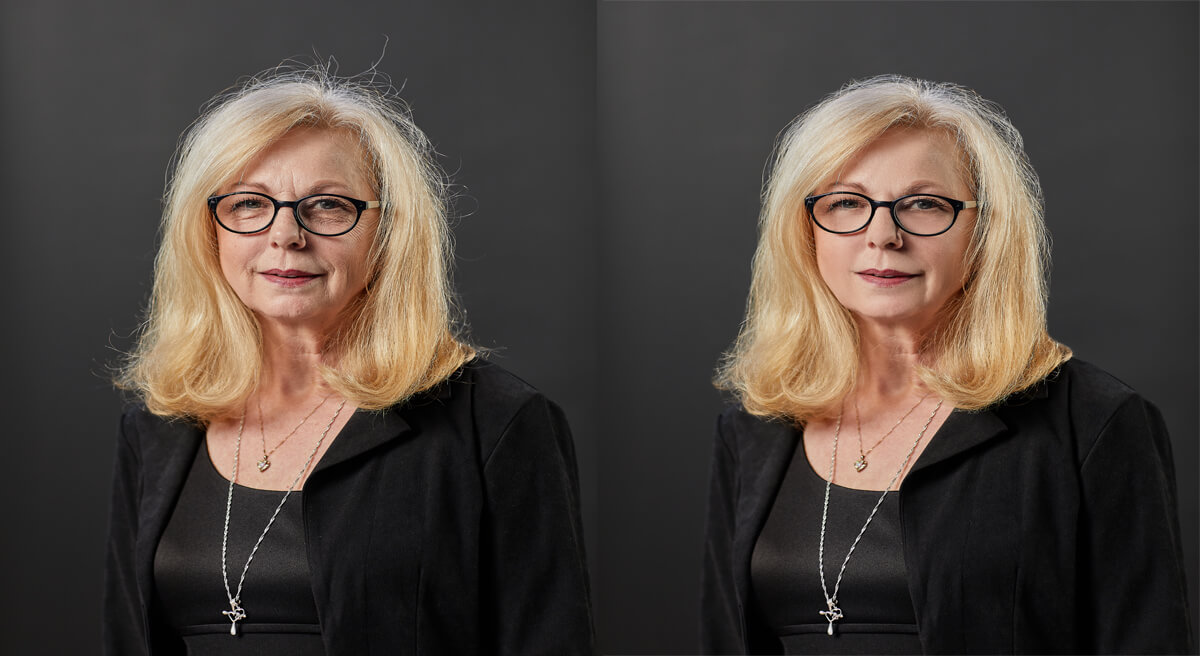
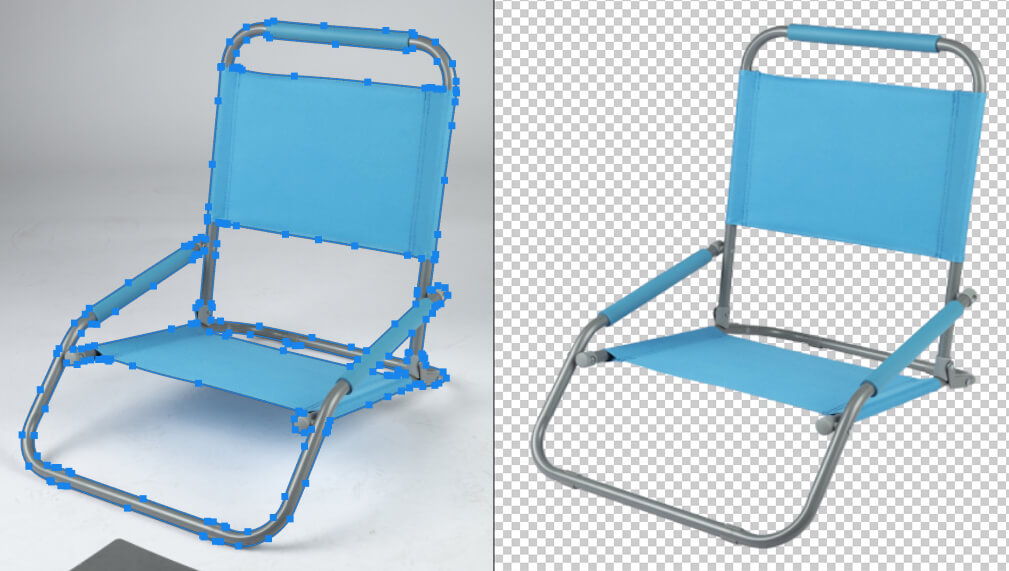
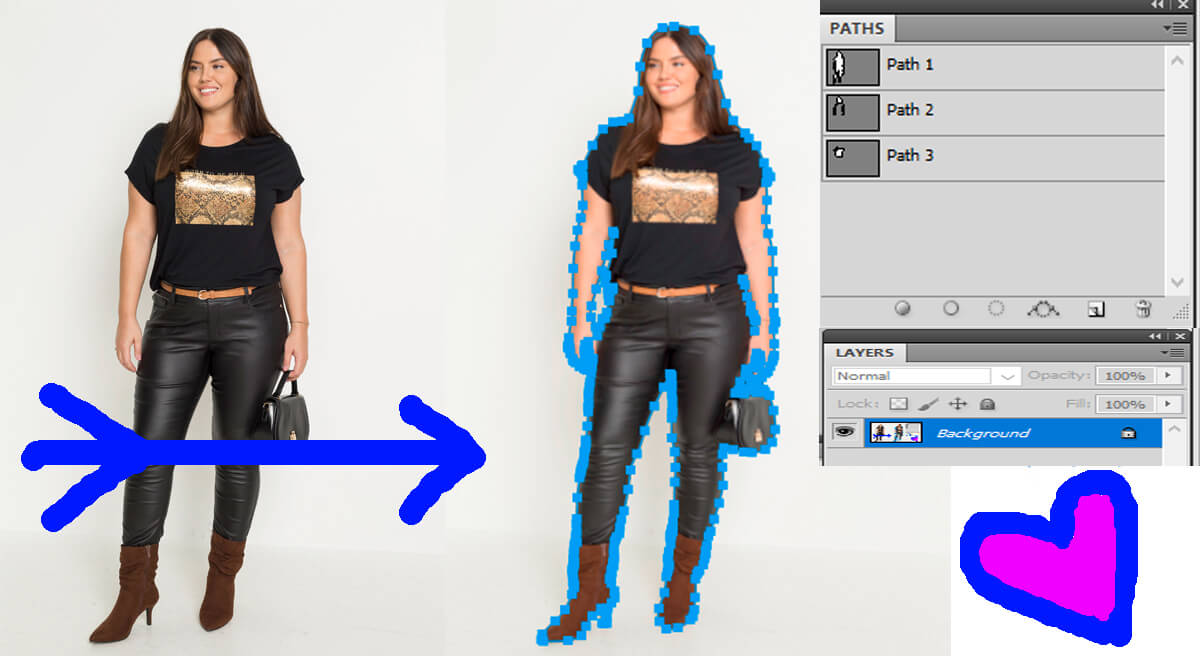
Next, ponder about the types of modifications you’ll require. A clipping path task, which entails cutting a 2D picture about an item, is less pricey than one that comprises image masking or the treatment of glares, wrinkles, and reflections.

If you just want creative or artistic modifications, you should probably pay extra. Attempt to modify the subject’s hair color, adjust the backdrop, and so on.

Conclusion
To conclude, a number of matters are relevant to outsource product photo editing and that is where you need to make a judgment call. Technically, you will need uncompromising quality that should be flawless, reasonable & affordable price to save the cost and the turnaround time to make the best use of your schedule as basic requirements.

Also, there are more to evaluate such as company policy, support act, ethics, and more that we have brought to you above. So, the cost could be variable while you have the service provider as you demand.

how to remove background from image

Background Removal in Photoshop has become the most asked image editing for eCommerce. Not every product needs the service without any excuse but depending on the product presentation, it is quite important. Furthermore, the world is in a pandemic due to the COVID-19 situation. eCommerce business has a good pace where product presentation without the background is crucial.

Remove background in photoshop is the best solution for current situations’ business online.

And why not? Any product or subject is best presentable when you remove random background. That will give you a distraction-free look for your targeted clients. Also, if you want to make your subject eligible for renowned websites for marketing it is mandatory. Moreover, to win the competition with your rivals in presentation, further editing should help.

Brief on Background Removal in Photoshop

To remove background from image, you must make a selection. But, why would you have to be limited with the selection method? Well, the reason for this is, if you don’t select an image cutout region, you won’t be able to work on it individually. And if you can’t operate independently, you won’t be able to clear the background exactly.

Fortunately, deleting the background may be done without the need for a selection tool. But, the options are limited to do express and exact background removal for sure. You can also create the selection first and then remove the backdrop using other tools.

For the transparent background, we utilize the following tools and options in Photoshop:

Pen Tool
Quick Selection Tool
Select & Mask Option
Geometric Marquee Tool
Lasso Tool
Background Eraser Tool
Alpha Channel Masking

Techniques to Remove the Background

Background Removal is an essential process of removing the current background from a photograph. For this, you might be familiar with the term Photo Background Removal Service. The entire operation is dependent on the subject’s and background’s intricacy. To remove background in photoshop requires a decent understanding of Photoshop tools and techniques. So, we bring you some methods to remove the background perfectly and efficiently.

Quick and Easy

Quick image background removal is a smart technique with several requirements for a successful outcome. In photographs, the subject, whether it is a product or a person, is attached by the background. So, it’s impossible to remove the background from these Raster format photographs. However, we can provide you with some pointers on how to deal with such photographs with minimal effort.

Step 1: Selection

Open Photoshop and load the image in it. You can use the latest version, Photoshop CC2021, or recent ones. However, the option we are sharing here is not applicable in CS versions or previous ones. One more thing, the subject in the photo should be over a solid-colored background and not busy. Otherwise, you cannot do it this way.

We’ll go to the Select>Color Range option in Photoshop. We set the fuzziness to 40, and the first eyedropper is selected to sample once. The second eyedropper is then used to sample different areas around the subject. The third one is for removing an area. You’ll see that the selected areas are white in the Color Range window. The rest are all black. To continue, press OK.

Step 2: Modification

To modify the selection by Color Range, choose the Quick Selection Tool. To add in the selection, press & hold Alt/Option for Win/MAC and click on an area. To remove an area from the selection, just click on the area or drag if required.
We’ll right-click on the selection and pick Select Inverse to select the subject only.

Step 3: Isolation

The subject isolation is completed as soon as we use the mask option. The selection, however, cannot be ideal without the change. And, you won’t be able to isolate properly if the selection isn’t right. Now that the topic has been effectively isolated, we can place any background we choose. Alternatively, if customers ask, you can retain it as is.

Clipping Path by The Pen Tool

The Path technique comes with a renowned tool called the Pen Tool. To create the path, Photoshop makes the pen smart. You may easily remove background from image after you have the path around the subject. You can, of course, use other programs.

You will find the tool in the tools panel. For smoother operation, you may use Photoshop CS6. And, this version is quite popular with designers. Or, you can use the latest Photoshop CC2021. The Clipping Path operation is almost as usual as previous versions. Open the image in Photoshop.

Step 1: Path

To make a path, you must begin from a point over the edge of the subject. The point should be two pixels inside by the subject’s edge. Well, two pixels within the edge isn’t always essential. The selection will be easier and more effective if you have a high-resolution photograph.

Make your first mark by clicking on the corner or any convenient edge. Then go on to the next location by clicking on the edge and drag it a little. You will get two handles this way. The handles have the ability to curve the path. You can also build a path if you don’t drag after clicking if there is no curve. However, the subject may not always be straight.

Step 2: Completing A Path

To complete the path, go through the edge in the same way. Then return to the starting position and call it a day. Save the path by renaming it. To rename a path, simply double-click on the Path and type a new name. If the Paths panel isn’t visible, go to the Photoshop Window menu and pick ‘Paths’.

Step 3: Path Edit

You must work with the anchor points to change the curves. For Win/Mac, hold down the Alt/Option key while clicking and dragging at an anchor point. This will reveal two handles. For Win/Mac, release Alt/Option, then press and hold Alt/Option again, then click and drag a handle. You may control the curvature in the path by moving a handle.

To remove an anchor point, simply click on it and it will be gone. To add one, click on the drawn path and you’ll have one. To relocate a point, hold down the Ctrl/Command key on your keyboard and click on a point, then drag it to a new location. The smoother the path, the fewer anchor points you use. However, don’t use too few points because you could not get an ideal result.

Step 4: Selection

For Win/Mac, hold down Ctrl/Command and then press Enter/Return. You will have the selection. You can also click on the work path by pressing and holding Ctrl/Command for Win/Mac for this.

Step 5: Background Removing

After you’ve made your pick, there are two ways of image background removal. One, create a layer mask. You’ll notice onion skin around the subject if you do this. As a result, you’ve got a transparent background. You can also apply the layer mask. Simply right-click on the mask and choose ‘Apply Layer Mask’.

The other way is, press Ctrl+J/Command+J for Windows/Mac. The subject will be copied to a new layer. Hide the background layer or work image. You have a transparent background for the subject.

Using the Alpha Channel Mask

Using the Alpha Channel Mask to remove the background is an advanced procedure. Apart from Image Background Transparent, the procedure has a lot of implications in graphic design. But, why is the operation unique? Because you can select and adjust only one fundamental color.

And, when other activities aren’t sufficient, this technique shines. We’ll utilize it in the tutorial to eliminate a huge area with similar colors. But, what are the most important colors to use? You’ve probably heard the term ‘RGB,’ which stands for ‘Red, Green, and Blue’. To select an area to remove or edit, we will use a single color.

Step 1: Selection of the Channel

Channel selection is the first stage in using Alpha Channel Mask. We are referring to a photo with a sky and any other scene in front. Well, you can pick any image you like. The sky’s primary color is blue, as we well know. So, we’ll work with the blue channel.

If the Channels window isn’t visible, go to Window and select ‘Channels.’ All of the colors are merged into one in RGB. Other channels, on the other hand, have black-and-white images when you click on them. This, after all, is all for show. When you choose a color from the channel, the image will reflect that color as.

Colors that aren’t white will appear dark. If you look at the image while using the Blue channel, you’ll see that the brighter portions have a blue color. We’ll go with the Blue channel for our sky selection.

Step 2: Masking the Channel

Press and hold Ctrl/Command for Win/Mac and click on the blue channel to use it for masking. This will choose locations based on their luminance. As a result, brighter spots will be chosen outside of the sky area. But there’s nothing to be concerned about. That will be taken care of later.

Now it’s time to put the mask on. A new mask named ‘Alpha 1’ will be discovered. We can leave it like that. To deselect, use Ctrl/Command+D on a PC or Ctrl/Command+D on a Mac.

Step 3: Photoshop Levels

To make dark parts darker and bright areas even brighter, we’ll use the ‘Levels’ feature. This is due to the sharp edges. They should also be in good condition, with no visible damage. So we’ll open the Levels window by going to the Image>Adjustments>Levels. For Win/Mac, you can also use the Ctrl/Command+L keyboard shortcut. They do the same thing.

The sky should be totally white, and the rest are completely dark. Without any problem, the image we’re utilizing works well. If the image you’re working with doesn’t function this way, make sure you equalize the levels once again. To apply, click OK.

Step 4: Black & White View

Now we’ll make the sky part of the image fully white, while the rest of the image will be completely black. So, the Brush Tool is the one we will go with. We switch the Blend Mode from ‘Normal’ to ‘Overlay’ to work safely.

When you work on bright areas with the foreground color white, the dark areas are not affected. Similarly, you can brush over dark regions without causing harm to light ones. However, entirely blacking out the other areas is difficult. So we’ll select one area at a time with the Quick Selection Tool.

You may need to utilize different selecting tools if you have trees and leaves, or any thin sections to darken. For Win/MAC, press Alt/Option+Backspace/Delete once you’ve finished choosing the region. And, the selected area will darken. Set the foreground color to black.

Step 5: Masking the Layer

We’ll combine the background layer with the Layer Mask at this stage. So, for Win/Mac, hold down Ctrl/Command and select the Alpha 1 channel. We’ll go to the background layer and apply a mask now that we’ve selected the sky area.

The sky is still visible, but the other areas have vanished, revealing the sky. Well, this is not what you need. So, we’ll use Ctrl/Command+I for Win/Mac to inverse the mask to hide the sky areas. The sky is no longer present but the others are.

Why Do You Need To Remove A Background?

The entire background removal is accompanied by an inescapable significance for digitized presentation. Without a doubt, product images require this technique for eCommerce presentation. Also, portraits require this in order to modify the scene as needed. This service is required for both marketing and photo presentation undoubtedly.

End Words

To conclude, background removal in photoshop holds a logical perspective. This one is quite important for a focusing photographic display. In addition, a smart operation might enhance your efficiency. Despite this fact, we were unable to cover all of the options in this little session. Obviously, there are other methods. But, the best ones are here for you.

product photo retouching and benefits of ecommerce

Product Photo Retouching and it's Benifits of eCommerce

Beauty is fragile! But, not when you have a photo retouching option at your hand. Perfection never comes out without effort. You need to do something before or after and sometimes both times. However, the best photo retouching is visible for product image presentation or highlights.

Product marketing is a solid and technical thing where the rate of competition is too high. Any renowned brand or professional spends thousands of dollars for the sake of effective marketing. Why? Because business is all about letting people know about the offer you have in hand.

In the year 2021, the online marketplace got a huge boost due to the pandemic situation caused by COVID-19. At the same time, physical marketing is running at the same pace as online. In both cases, product photo retouching plays the prime role in the presentation and then the rest.

So, literally, what you need to marketize your product that attracts the eyes of your potential customers is professional photo editing services. Well, there are lots of other things to do along with. But, if you cannot focus on the core of effective digital marketing, others will not be enough to cover up the gap.

What is Photo Retouching?

Before jumping into the long discussion of photo retouching, first, we should talk about the definition. So, what is Photo Retouching? Google Translate says, “Improve or repair (a painting, a photograph, makeup, etc.) by making slight additions or alterations”. Yes, this is the dictionary meaning of retouch.

Technically, the basic part of the theme is interrelated to the major service called the Photo Retouching Services. Well, we do not need to discuss the service in detail as we can understand the inner meaning of it.

what is image retouching

So, what we can define is a solid tangible fact. And, that is, photo retouching stands for such operation or service to improve or enhance the real view of a product, person, or object. And, the very thing that we can get is the eye-catchy and perfect image subject that attracts customers.

Small localized modifications to an image are often performed by retouchers. And, retouching is the refining of an image that is usually done after global modifications including color corrections. Also, a retoucher focuses on correcting additional parts of an image after the white balance, cropping, and color profile have been set.

Types of Photo Retouching Service

Uncovering the very thing at hand, we can figure various work operations considering the subject. While a perfect photo shot may take several attempts, image retouching does not. So, removing all of the flaws from the image is just a matter of few touchups in stages.

In the practical sense, you will get a flourishing appearance without spending hours with this service. Adobe Photoshop is a popular choice for the job that allows you intimate and detailed focusing and enhancements. Newborn photo editing services are also a part of this core but are good as individuals.

However, the most remarkable and unavoidable part is a skilled graphic designer to provide the greatest service. A professional photo editing company provides all of these for the significance of the product look. Let’s take a look at how Clipping Path Editing has organized the services based on the type of job you need.

Product Retouch

Bringing front the most demanding part of photo retouching types is product retouching. As there are numerous retouching steps that may be made to product images. And, this goes with significance in order to make them more appealing to potential customers.
So, it is crucial to keep in mind that there are a number of levels for retouching.

Enhancements such as correcting scratches or traces of impurity may be included in basic retouching. Work like enhancing stones in jewelry or giving definition to diamonds is one prime objective. Also, making gold or silver sparkle, applying textures to the leather, reducing glare, and more can be done with more advanced retouching.

Beauty Retouch

Beauty Retouch? Sounds like a face retouch or something like that. Well, the reality is, this specific kind of touchup is for any sort of beautification you need over a subject. The subject could be a product, a machine, a box with labels, a human being, or any animal. The moral is, the perfection gained by photo retouching is the Beauty Retouch.

beauty photo retouch

A professional photo retoucher does the job in several ways that suit them best. Also, they often keep the touch ups modifiable so that anytime they can change the effects. So, if you need something like this to polish any of your images of products, you know what to do. Just ask for the service and we are here to give you as you want. Blemish photo editor is another online option that is useful sometimes.

Model Retouch

Model Retouching service is another type of core Photo Retouching Services. Product photo retouching, often known as model retouching, is a vital aspect of the beauty and fashion industries. The prime objective of private photographs for model photography is to enhance the model’s innate beauty.

Aso, commercial shots are far more diverse and unique on the other hand. Making each image catchy to the eyes of the buyer is the goal where this retouch option is mandatory. The model’s soothing beauty will be highlighted, and the attractiveness will be focused on. The photographs are mostly used in publications, e-commerce or websites, beauty products, and more.

Digital Makeover

What if you have a clean and beautiful surface on your product or model but are still not catchy? No worries mate. We have Digital Makeover to make a remarkable enhancement in digital photos. Since the photo is taken already, you do not like to make the whole preparation for getting the same shot with the makeover, do you? So, you know what to do.

Also, a digital makeover entails reshaping your online presence to make it web-ready. In the digital world, standing out from the crowd and gaining consumers can be difficult and dangerous undertakings. Competition is all over where you need to make your product or presentation that gives better impressions.

Color Retouch

Moving on to the next one where you can change, modify, enhance, redeem, or remove colors from photos. The best part is color shuffling for the same product presentation in different colors and appearances. Moreover, you can have toning for the product surface of skin smoothing.

Only professionals of Clipping Path Editing can give you the best results for tremendous modifications.
When a hairdresser applies a single color to your root area, where natural hair growth begins, this is known as a color retouch. During a color retouch, hair color is only applied to this area. Covering gray, darkening, or softening your root color are all options.

HDR Blending

Bored, having the same usual photo effects that come through the default setting by DSLR or Mirrorless cameras? Chill out, dude. We bring you a variety of effects that come digitally with the High Dynamic Range blending, HDR in short. Now, you can ask for light deeming, contrast increasing, night shading, and more. All are done by camera RAW, so there will be no loss in image details.

Exposure Blending and HDR both employ the same set of bracketed photos. The photos are then tuned by Photoshop’s Camera RAW filters with advanced features. However, either Lightroom or Photoshop is capable of accomplishing this. This tone mapping technique will come back in an HDR image that you may then alter further if desired.

High-End Retouch

What would be the remarkable differences if there is nothing special? High-End Photo Retouching Services is the one we are referring to. As the words indicate, this retouching goes into the very detail of an image. Well, there are several methods to do the job efficiently. But, one of the most remarkable ways is Frequency Separation. And, this is where we work non destructively.

So, for a single shot, the high-end editing procedure can take many hours. The retouching technique we use on damaging the skin texture is another one with less effort. Also, the method necessitates the use of advanced procedures. And, to maintain a natural, clean, and dynamic appearance, High-End Retouching is the best of performance we bring.

Photo Restoration

Last but not least comes the restoration procedure for damaged photos that carries special moments. Photo Restoration itself is a product where the activities come thru a service but gain precious moments from destroying. Still, there are some limitations. The damaged photos must have sufficient resources to recover the damaged areas.

Hence, digital photograph restoration is the work operation of removing noticeable damage in photos. Also, aging effects from digital impressions of physical photographs thru a range of image editing techniques. Dirt, scratches, and other evidence of photographic age are manually erased by delicately painting over them.

Who to Retouch Product Photos in Photoshop?

Almost every person who works with images uses this service. And, as we are concerned, everyone is now connected to photos this way or that. Fashion agencies, advertising firms, printing presses, and any company that engages in digital marketing are in the front row. So, they require either product photo retouching or modeling photo retouching the most. Also, high-end retouching has a remarkable position to enhance natural beauty electronically.

retouch product photos in photoshop

Wedding photo editing is another service that people ask for every event. Management organizations, private photography firms, individual photographers, and wedding planners are in the queue. Furthermore, individuals are now getting interested in the use of image enhancement services such as Photoshop editing.

Photo editing software is mandatory for old photo editing, regulating saturation, and resolving lighting difficulties. Also, Retouching Services comes next that liaison houses serve as a media for photo editing services.

Additionally, eCommerce websites use the service to provide a visually appealing product presentation. As a result, Photo Retouching Services are used by everyone or any corporation who wants their photos to be perfect.

Why Do You Need Photo Retouching Service?

Clipping Path brings forth photo retouching services to fulfill your requirements and more. Because stains, blemishes, aging, and unwanted items in the frame are all sidetracking elements. RAW photographs will not stand out for publishing for various reasons. One of the remarkable things is the format of the file that is unsupported. Still, RAW photos are heavy and not a good idea to use on the web.

best photo retouching service company

So, from dull images to polished ones or basic images to modified versions, you may edit them at will. The requirements for the product of portrait presentation are not always the same. So, you can get what you want eventually. Also, photography retouching services outsourcing is cost-effective and reasonable at the same time.

Benefits of Product Photo Retouching

Before going thru the benefits of product photo retouching, it is necessary to learn about the fields. Though we have discussed that above in the “Who to Retouch Product Photos in Photoshop?” section, there is still more. The basic part is impurities corrections naturally to bring the basic look. Next, the smoothening, highlights, toning, and more come one by one.

So, the benefit you can get from product photo retouching is getting flawless image looks. If you have a closer look at the product images on eCommerce, you will know the reasons. And, to beat your competitors you need to get the best of product photo retouching.

Why Choose Clipping Path Editing for Your Best Photo Retouching Service Company?

product photo retouching for ecommerce

You might be wondering why you should choose ClippingPathEditing when there are hundreds of other options. So, let’s have a look at a few of the reasons in bullets;

Project management by dedicated industry professionals
Quality uncompromising, view appealing
Reasonable price with bulk discounts
Smooth operations
Regular monitoring
Negotiation open for new projects
Priority works under certain terms
Recommendation evaluation
Never taking demand or level of satisfaction for granted
Meeting unique requirements properly

Final Word

Clipping Path Editing can provide you with the most incredible service. Contact us right away for a quick response. Even if your project does not fall within the scope of our services, you are welcome to contact us about it. We go above and beyond the list of services we offer. ClippingPathEditing’s Photo Retouching Services take your image to the next level of visual impact.

what is image clipping path service

The Image Clipping Path Service is the initial stage in separating a subject from an image. The aids in the distribution of images is to remove unnecessary items and backgrounds. The Pen Tool in Photoshop is the best option to do that intimately.

Clipping path services are truly professional services that providers offer for extracting objects or persons from 2D photos. Sometimes you can include other photo editing and additional services along with this one if necessary. So, clipping path is a Photoshop operation for removing the background from an image.

clipping path in photoshop

And, it is done with the Pen Tool or some other methods that are convenient to serve the purpose. When the photo subject has sharp, smooth edges, a clipping path is the best option for the application. The clipping art route stays straight as the final result of this.

What is Image Clipping Path?

The origin of the clipping path came from Photoshop operation so you can call this clipping path in Photoshop. The technique for removing the back part from an image by clipping is basically the Image Clipping Path. Clipping is amazing as long as you’re not cropping anything that you want to see details in.

So, clipping occurs at the time the intensity in a specific part of an image falls outside the range. And, this is what is represented in digital photography and digital video. Background transparent in photoshop by the process is a common use.

why do you need image clipping path service

Also, clipping can be useful in any of the image’s color layers individually in a color image. A clipped specular summit can contribute to the image’s perception of brightness. And, as an artist and an editor, the final decision is yours.

Types of Image Clipping Path

Photo Editing Services are of various categories and Image Clipping Path is one of them. Also, Clipping Path Service is the most used method that has several types. The technique involves creating trails around an object that you want to delete is dependent on the image subject. Whether it is for background removal or perfection isolation you need to be specific about the types.

One of the mentionable reasons behind the types of the operation is the cost. Photo subjects are in a variety so are the difficulty level. Well, you cannot have all the difficulties under a specific price or constant work operation. Some of the clipping needs only a minute whereas some may require hours to do a perfect path creation.

So, the types of Image Clipping Path are as below;

Basic Clipping Path

A basic clipping path is an easy way for manipulating images. The goal of the clipping path is to separate an image’s unworthy backdrops. Or, to extract an image from an unsatisfactory background and can also be used for further applications. Easy Clipping Path is a type of clipping path that has no holes and few bends.

In fact, products that got round, square, or basic curved geometries are suitable for the basic clipping path. Moreover, it’s the basic clipping path for it’s flexible in terms of effort, time, and, more significantly, money. And, it is possible to handle a big number of image files in a short amount of time. Examples of this type are a mug, a dice, a box, a phone, etc.

Simple Clipping Path

Comparing the previous type of clipping path, this one is a little time-consuming but not enough. Curves, lines, holes are present on the subject along with several anchor points. However, some service providers may combine the basic and simple operations as one to shorten the description. But, the path for subjects still requires more time.

Also, the price is higher than the previous one as well as more labor is required. Subjects contain more variation around the edges and it requires changing the direction while creating the paths. Well, the price difference is only a few cents that are not a matter of high concern. Toys, pen holders, basic showpieces, etc. are examples of the Simple Clipping Path.

Complex Clipping Path

A complex clipping path is used to crop out or removes the background of a complex image. Despite regular clipping path techniques, it is an advanced clipping path strategy that results in a wide range of sizes and shapes. So, photographs with complex shapes, designs, or groups of people are the subjects.

And, these images have a lot of holes/embedded transparency, as well as a lot of closed paths. A chain, group people, furniture, group bracelets, fuzzy dolls, jewelry, net, group images, and cycles are examples. The price is high and variable considering the subject and the complexity. And, the production time will be more according to the terms.

Super Complex Clipping Path

Difficult subject images with complex & compound shapes, abundant embedded transparencies are present. Also, adequate closed & outlining paths and curves, such as net, various decorations are for Super Complex Clipping Path. Fence, cage, basket, group photos, greenery & flowers, etc. are examples.

Well, the subjects and conditions are worthy of using the extreme clipping path service. The complexity is too severe and the service takes long enough and requires a lot of patience. And, it also necessitates the use of Photoshop’s pen tool and professional touch. Moreover, the time requires to complete a task of this sort is high like hours.

Compound Clipping Path

A compound path is a comparatively different path that has been added over another path. And, it’s linked to other paths that are simply inclusive and exclusive. This complicated Clipping Path is used to prototype goods or products with a variety of basic and compound shapes. In products with a lot of curves, the compound clipping path service is used.

Also, a compound clipping path got two or more sub paths for the purpose to use to mask one another. Well, if you want to select an image in a doughnut-like shape like circular paths to clip the picture inside and outside the O shape. But, it doesn’t have to be circular; any shape will do so far the paths aren’t open.

Multi Clipping Path

The Multi clipping path we use in a variety of ways. Color correction is one of the most important services provided by the multi-clipping path. And, it stands first among the numerous aims. Fashion catalogs, garments, jewelry, e-commerce website products, fashion design, etc. are the sectors. Also, materials/images, web template designing, interior design, kitchen appliances, and other items as well.

You can change each path into different colors or versions, by the use of multiple clipping paths to select individual parts of the image. Also, we may use several clipping paths to segregate colors, fills, resize objects, modify opacity, and other things. And, the paths are in different layers to do any enhancements without harming others.

Clipping With Shadow

A shadow is crucial for realistic and lifelike images you need to use for both product images or personal ones. And, the demand for realistic image presentation is indescribable in business. So, displaying product photographs in a natural and genuine manner is essential. The Photoshop shadow effect can be used to make the image more natural.

When you place an image onto another solid-colored backdrop after the extraction, it appears to be floating and unreal. And, it will appear like the object is separated from the ones behind it. However, there are several types of shadow effects such as product shadow, natural shadow, drop shadow, reflection shadow, etc.

Unwanted Object Removal

Object removal from images is simply another further option of Image Clipping Path Service. And, it is commonly employed in the photo-related business sectors. Well, it is, in reality, a service that removes or highlights any object by removing the unwanted unsuitable items.

Object removal services got a variety of purposes where the most essential of which is to isolate unwanted objects. Products from the rest of an image or to remove the existing background could be requested by the client. And, it’s vital to make the products look more enticing to potential clients. Many undesired elements may be present in the frame during photography that you can have removed.

Why do you need Clipping Path Service?

The prime objective of the Image Clipping Path is background removal that requires perfect marking. And, that is because the margins of the subject’s edge are more defined. Moreover, it is easier to use for photographs with differentiation of backgrounds and foregrounds.

A Clipping Path company works to separate undesirable items while smoothing the edge for a professional touch-up. A large number of purposes you can find in eCommerce products as well as websites. You need the product image isolated from any random background that distracts the view.

The photography brings out every detail even with the impurities that come by the edges. Clipping Path is the best option to correct them to make the presentation flawless. The use of image clipping ensures that all vertices have the best 2D coordinates.

And, it also helps prevent overflow of depth-buffer values when used in conjunction with far-clipping. Also, there are so many reasons why you may need the clipping path for products or people. In addition, eCommerce websites have certain rules to follow and the mentioned ones are among them.

Who needs Image clipping path Service?

This service is especially essential for people who handle product photos. People work with individuals as well as businesses, eCommerce, fashion firms, and other entities. Online retail sites such as Flipkart, Amazon, Aliexpress, eBay, and others rely heavily on professional Clipping Path Services.

Also, these websites got their own guidelines for presenting merchandise or model photographs. moreover, the restrictions happened to be so severe that you can’t go around them. For every step of your need, Clipping Path Editing is here at your disposal.

photo clipping path provider

Every e-Commerce agency, advertising firm, digital marketing channel, modeling institution, and photography school will undoubtedly want the best clipping service. And, this is to enhance their photographs a professional look while also making them attached to the crowd.

Benefits of Clipping Path Service

Up until now, we were going through the details of the service and the classifications of it. Well, this is the time to discuss Clipping Path Service’s application in various sectors. The service covers a wide range of sectors online and offline platforms in business and personal perspectives.

benefits of clipping path service

The goal of all the initiatives is to improve sales on the internet marketplace in the first place. Furthermore, the effects created by the operation are clean and accurate for both online and offline use. As a result, for a higher chance of success, you should go with the greatest clipping path service provider firm or individual.

Why Choose Clipping Path Editing for your best clipping path service?

Clipping Path Services holds the most often requested photo editing services for long. Marketing objectives demand product images isolated from the background without any alteration. Furthermore, marketing is truly reliant on appealing product visuals to bring the best out of it.

So, Clipping Path Service is the most vital step in creating a magnificent product presentation. Companies and individuals engaged in product promotion appreciate this service the most. After you’ve isolated the subject, you can move on to other photo editing techniques. We provide Clipping Path Services across the board to meet the necessities of our clients.

Final Word

To conclude, the need for your dependable clipping path service company in your area is Clipping Path Editing unlike any other. For your convenience, we now offer you on-demand online services the fastest and assured. Because of the manual Photoshop operation that we utilize, the editing we provide is executed offline. Behind that, all of our operations are online and on-call 24 hours a day, seven days a week.

So, ask us any question at any time, and our responsive customer service crew will respond in a timely manner. You will also get free trials and price quotes quickly. To go to the next step, send us your images to our online space. Use our FTP, We Transfer, File Mail, Dropbox, Plus Transfer, and other service accounts for uninterrupted file sharing. We are and always will serve you the best you can get.

Welcome to Clipping Path Editing. To check our quality send 2 images for a Free Trial.

X